FAQ: Frequently Asked Questions about Aelo
Frequently asked questions about Aelo: how much does it cost, what are AeloCoins, which AI models do we measure, do we publish content, and what…
You can set up an Aelo account in just a few minutes. You choose plan, you enter your details and the brand’s details, and in Free plan You start without a payment card. Once you’ve confirmed your email address, you log in to the dashboard and can top up brand identity, and then run first measurement.
Below, we describe the registration process step by step: from choosing a plan to logging in for the first time. We also show the entire process in a video.
Prepare:
Aelo is designed for businesses and organisations. You cannot create an account as a private individual.
Visit the website registration. The first step is to choose a plan: Free, Starter, Pro or Custom. The toggle Monthly / Annually You’ll see the prices when you receive your annual statement, which is 20% cheaper.
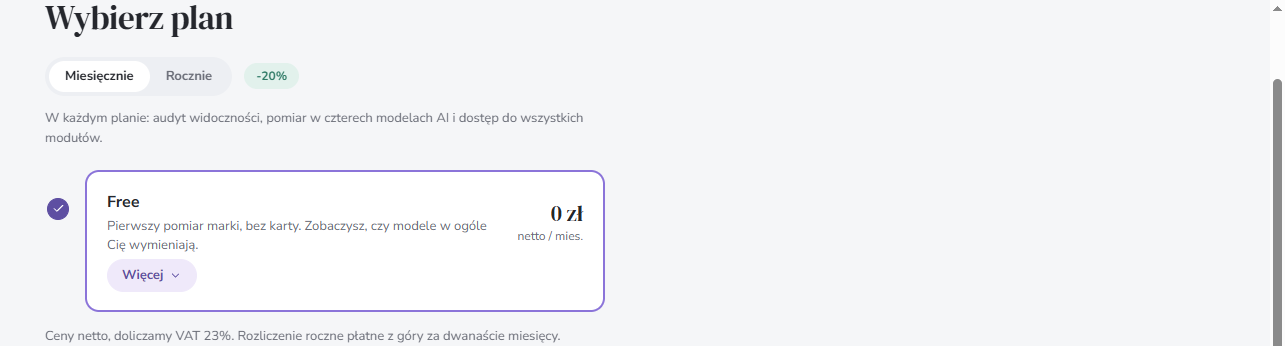
You don’t have to decide once and for all. You can change your plan later in the panel; for a full comparison of the plans, see our pricing.
In the second step, you complete the form Create an account:
In the paid plans, the form still has a field Company’s country, required for the invoice. Finally, tick the box to accept the Terms and Conditions and the Privacy Policy.
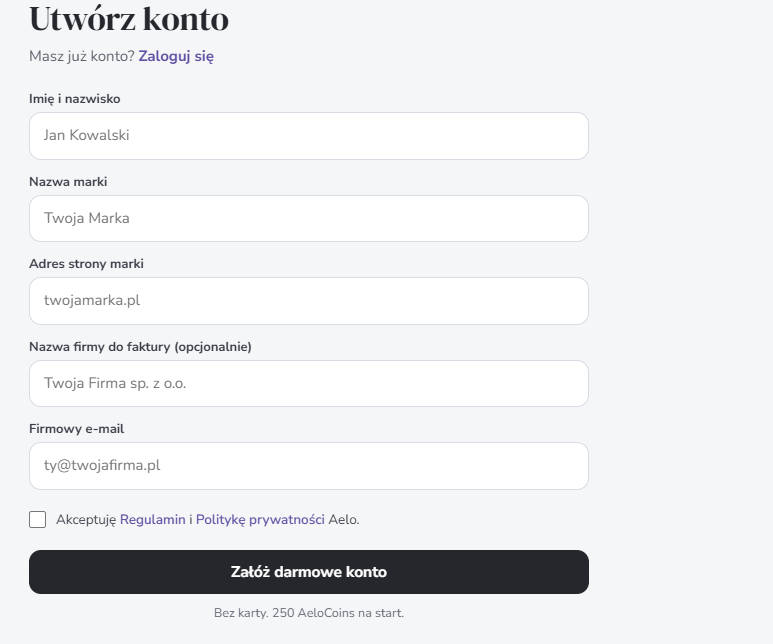
On the Free plan, click Create a free account. You don’t need a card, and you get 250 AeloCoins to start with.
In paid plans, the button changes to Proceed to payment. You provide your card details, and the first charge is taken once the account has been set up. With annual billing, you pay for twelve months in advance. The prices shown in the dashboard are net; we add 23% VAT to them.
When you click the button, you’ll see a screen Check your inbox. A message will be sent to the address provided Confirm the creation of the space with a link. Click Confirm and create a space: Only then is your workspace in Aelo created.
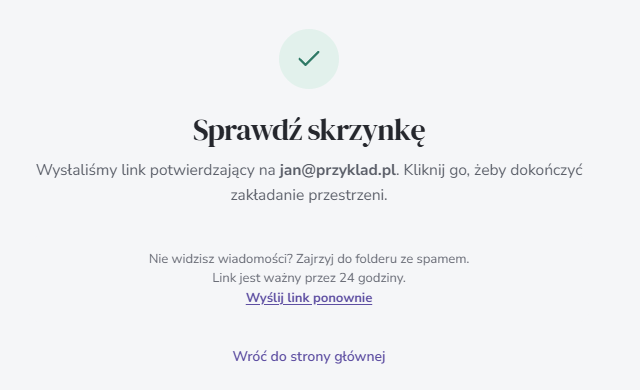
The link is valid for 24 hours. If you haven’t received the message, please check your spam folder or click Send the link again.
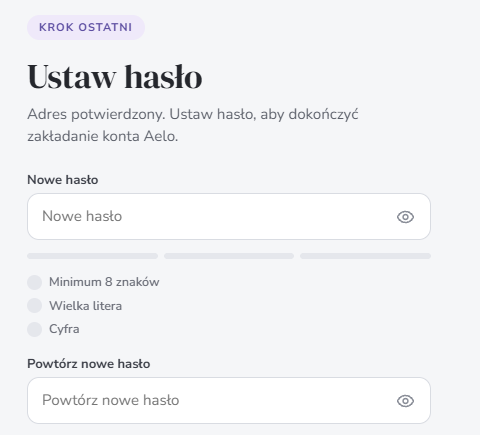
The link in the email takes you to the final step: Set a password. The password must be at least 8 characters long and contain one uppercase letter and one number. Enter it twice and click Confirm and set your password. You’ll see a message The account and brand are ready.
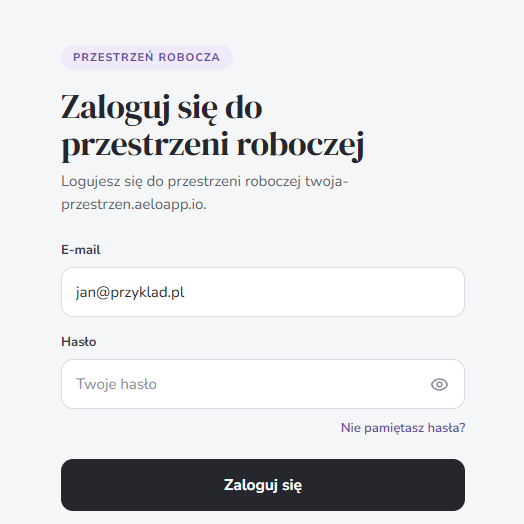
Click Go to the login page. You’ll be taken to the login page for your workspace – that is, your personal Aelo account address. Bookmark it, as you’ll need it to log in. Log in using your work email address and the password you set in the previous step.
The first time you log in, the brand profile you provided during registration will open straight away. You can find your account settings – including your personal details, company details, password, plan and invoices – under the button Account panel in the top right-hand corner of the app.
To begin with, you’ll see a list in the panel Start with these steps. It takes you from finalising the brand identity to the first scan. We describe how to go through this process step by step in the article How to add a brand in Aelo.
The Free Plan is designed to check whether AI chatbots mention your brand at all, and have a look at the dashboard before you choose a paid plan. With it, you get:
We explain what happens after the first test and when the results will be available in our article on the first measurement.
No. The Free Plan doesn’t require a card. You get a one-off measurement with a full report and 250 AeloCoins.
Aelo is designed for businesses, which is why we ask for a business email address when you register.
Yes. Upgrading to a higher plan takes effect immediately, whilst downgrading takes effect from the next billing cycle.
One in the Free and Starter plans, and three in the Pro plan. You can purchase additional brands on the Pro plan, whilst on the Custom plan we determine the number when providing a quote.
Check your spam folder. On the ‘Check your inbox’ screen, you can also click ‘Resend link’. The link is valid for 24 hours.
At least 8 characters, including a capital letter and a number.
On the login page for your workspace. You’ll be taken there when you click ‘Go to login’ at the end of the registration process. Bookmark this address.
No. The prices quoted are net; we add 23% VAT to them.
Having trouble registering? Please email kontakt@aeloapp.io.